Disclosure: Any post may contain links to my shop or affiliate links, which means I may receive a commission from any purchase you make. All opinions about products I use are my own. Read the full disclosure and Privacy Policy HERE.
Today I’m going to show you how to use your Silhouette machine to make tab dividers (and I have a little surprise for you at the end I think you’ll like). Customize your planner with your own tabs. You get to pick the paper, making it one-of-a-kind. Yes, you may be questioning my sanity right now since I sell tab dividers in my shop, but in case you buy the printable planner to put together yourself, I wanted you to be able to make tabs too.
This demo will take you through how to make a set of tab dividers to fit a mini-binder (fits 5.5 in x 8.5 in paper). The seven-page set includes 6 tabs + a page-flap at the end.

This post contains affiliate links, which means I may receive a commission from any purchase you make. All opinions about products I use are my own.
First – Design Your Silhouette Cut Files
Before we start creating the cut files, I want you to know some of the thought that went into the measurements. I figure if you know how I came up with them, then you will have an easier time designing your own from scratch. I will give you all the info you need to create tabs just like the demo, though, so don’t worry if you want to just skip the next picture.

Now we’ve got the math part behind us, the rest is much simpler to understand.
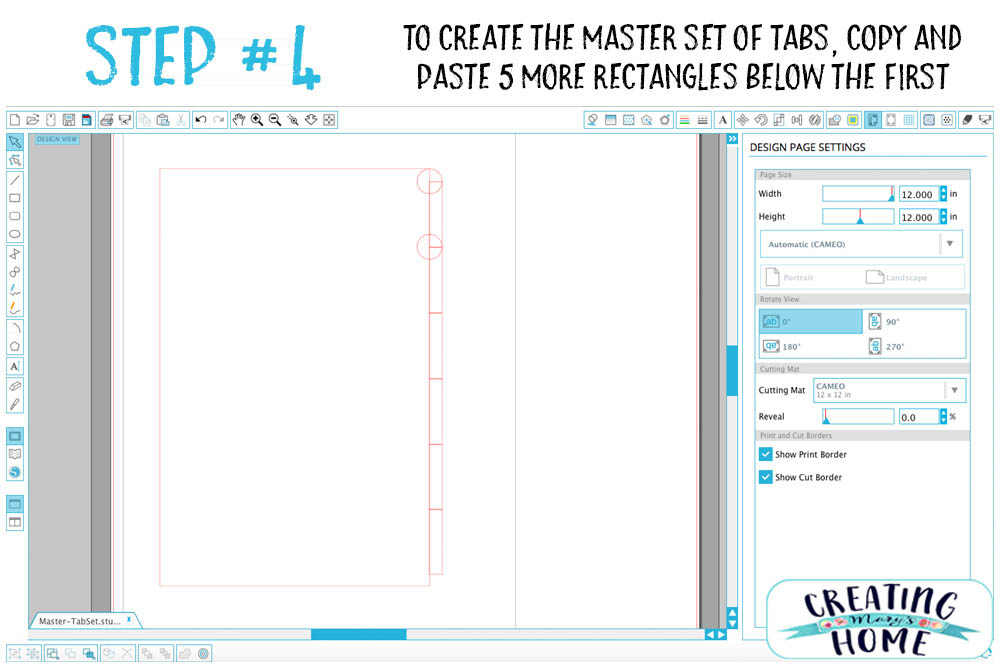
We are going to get started by creating a MASTER FILE. This will have all the shapes you’ll use for every page in your divider set. The beauty of creating a Master File first is that it will be easy to create all of the individual pages and have them match up correctly, because you did all the work in this first file!

^ If you can’t see the measurements well in this image above, the rectangle is 5.503 in by 8.508 in.


Now you should have all the files you need for cutting. Let’s get the paper ready.
Prep Your Paper
The most fun part of this is getting to choose your paper. Have fun with it!! You’ll need SEVEN pages. For this demo, I used a Designer Paper Pad in Mint Julip. I like using pages from the same scrapbook paper pad for my tab divider sets, because they usually coordinate well. Of course, there are no rules about this – mix and match all you like.
Next, cut your paper to fit better in your laminating sheet. I cut these down to about 6.5 in x 9 in.
{Tip: save away these nicely sized extra pieces to use later. Laminate, cut, and then hole-punch to make durable bookmarks.}

Laminate!
Take the time to laminate your pages. If you go through all this work to pick just the right paper and cut them out, you might as well laminate them so they’ll last a long time. I liked this laminator so much that I ordered a second one for my planner studio. I buy the laminator plastic sheets in bulk for the same reasons I have two laminators, but they also sell them in small packs.
Cut the Tabs – Use Your Silhouette
When I was first experimenting with my own tabs, figuring out the cut setting was tricky. There isn’t a “laminated page” setting, so I had to play around with what works. I figured out that I could cut using the “Coverstock” setting, making sure to also select “Double Cut.” If the paper is thicker card-stock, then I’ll probably increase the blade length. I suggest doing a test cut on a page you don’t care about. Hopefully knowing my settings will give you a head-start on finding just the right one that works with your paper choice. (This is the Silhouette machine I use.)


After all your beautiful tab dividers are cut, hole punch to fit whatever binder you want. Normally I love discbound binders, but there is just something so festive about this cute damask 3-ring binder.


Surprise!
Since I’ve created these Silhouette cut files just for this demo, which are different from the tab shape I sell in my shop … I thought “Hey, why not just give them away?”
Download the cut files for these mini-binder size (5.5 in by 8.5 in) tabs {For non-commercial, personal-use only.}
From my home to yours,
Mary
PIN THIS POST

What program are you using for this project?
Thank you and have a great day!
It’s Silhouette Studio.
The link to the Silhouette you recommend is broken. Could you please advise which one you bought? Thanks.
Thanks so much for letting me know about the broken link. Here’s the machine I used in a different link: https://amzn.to/3mgvq6V
Thank you for this! I cut them without the holes. I’m using them to store my Etsy shop inventory so it’s easy to flip through, it’ll save so much time!
Yay! So glad to you can use this!
Do you know all the measurements for a regular size binder?
Thank you!
If a piece of copy paper is 8.5 by 11, you’ll want your tabs to fit that, but then the tabs poke out a bit further.