Disclosure: Any post may contain links to my shop or affiliate links, which means I may receive a commission from any purchase you make. All opinions about products I use are my own. Read the full disclosure and Privacy Policy HERE.
I have this terrible habit of waiting a long time to show you my projects! I finished my collage wall last summer!! The finished wall is probably my favorite wall in the entire house. It was a labor of love and I planned it for so long while I was pregnant, sitting in the recliner and staring at that wall! I’m going to dedicate this week to slowly revealing the collage wall. Today I’m going to show you how I updated the boring frames. Later this week I’ll show you how I planned the wall configuration, then I’ll reveal the wall itself!
I’d been collecting frames for a while for this project. I only had to buy a few of the frames new for this project, like the big one for our family photo. I wanted to re-do the frames so that they would reflect my style and form a cohesive group. Also, I love color … so I wanted some color!
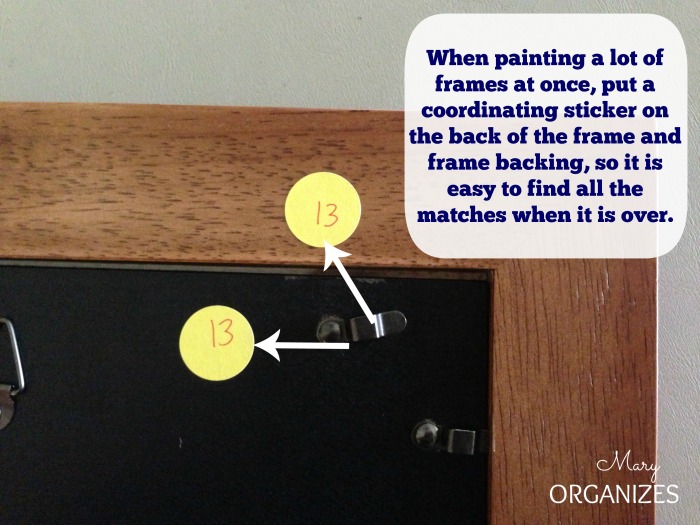
Step #1: When you are going to do a big project using a ton of frames, do yourself a favor and keep track of which backs go to which frames. You think it will be obvious when you go to put them all back together, but it will not! I use little circle stickers and use the same number on 2 stickers on the back of the frame and the backing of the frame.

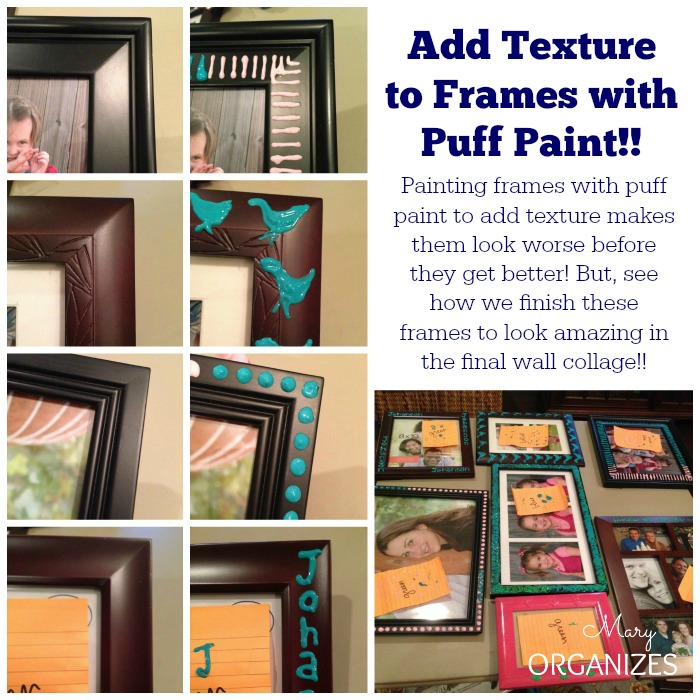
Step #2: Add puffy paint to give boring frames a bit of texture. It doesn’t matter what color, because you will be painting over it. Yeah, it looks horrible with just the puffy paint, but even when you do a horrible job with the puff paint, somehow it all comes together and looks awesome on the final project. There is no specific rhyme or reason, just bring out the tween in yourself and HAVE FUN WITH IT!!!
Step #3: After the puff paint dries, spray paint the frames with colors that coordinate in your home. I like to do my spray painting on cardboard over my grass. It makes for easy cleanup!
Step #4: After the spray paint dries, go over the frames with an antiquing glaze. You paint the glaze on in patches and then spread with a rag. You can use a damp rag to even the glaze out in places it gets thick.
Step #5: Get adorable helpers! This was Cougar last summer while I worked on the project in the garage! He is so much bigger now!!! Gotta love big sisters that treat you like a doll … he really needs that princess bike helmet for the exersaucer. Ha!
Step #6: Let the antique glaze dry, then put the frames back together with the pictures of your choice.
Alright, there are some sneak peeks of how the frames are looking. I’m going to make you wait until Friday to see the full collage. You will be shocked how all of these random colors and frames come together!! Be sure to check in Wednesday, when I show you how I plan and organize the collage wall.
From my home to yours,
Mary


YOu can use a glue gun also- if the paint sticks to it/
I thought about a glue gun, but then I pictured all the glue strings everywhere … changed my mind! lol